Install SophMate and Complete the First Provider Test
Install SophMate, add an OpenAI or Anthropic provider key, run the connection test, and confirm budgets before users begin AI-assisted work.
Install SophMate, add an OpenAI or Anthropic provider key, run the connection test, and confirm budgets before users begin AI-assisted work.
By the end of this tutorial, you will know how to use SophMate for SophMate setup while keeping the work reviewable inside WordPress.
A store owner has installed SophMate from CodeCanyon and wants to verify that the AI provider works before editors start using Copilot.
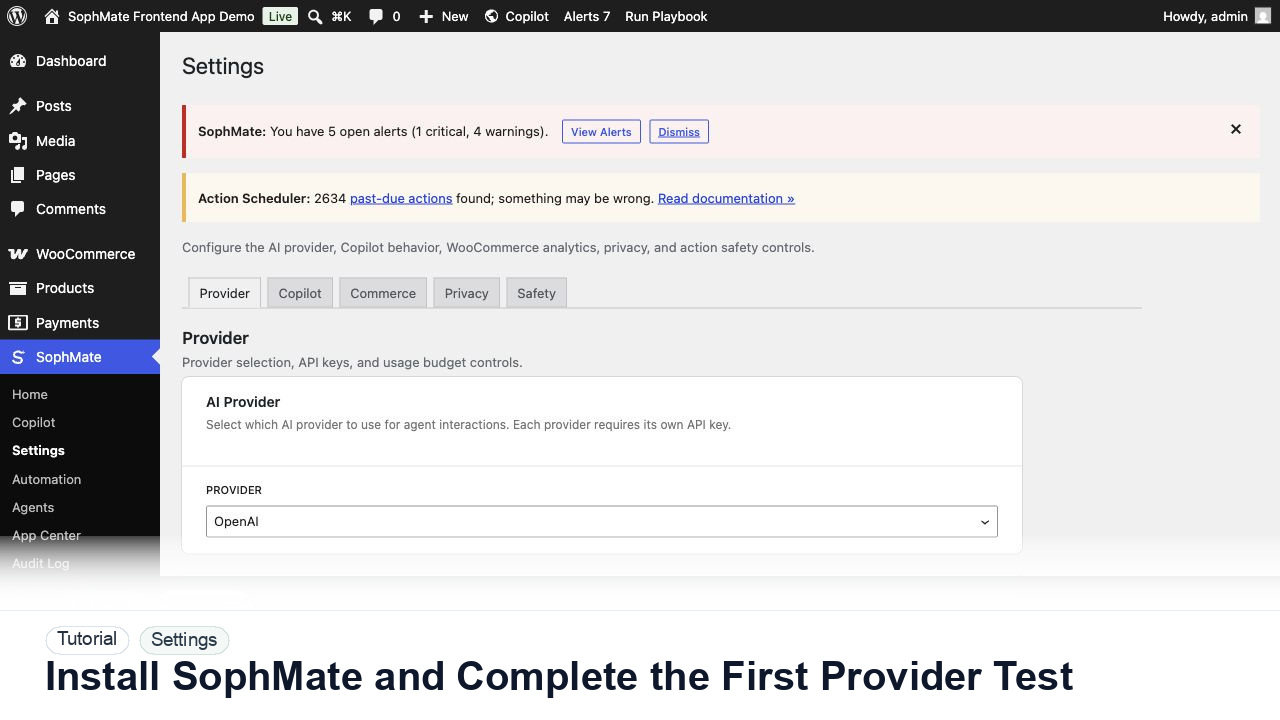
The tutorial image focuses on the SophMate Settings provider tab, where the AI provider, encrypted API key status, connection test, and first-run setup controls are visible.
Do not share provider keys in prompts, screenshots, or support requests. Use Diagnostics for status evidence and keep budget changes owned by an administrator.
Check WordPress version, PHP version, OpenSSL, DOM, iconv, and outbound HTTPS access. SophMate uses encrypted provider keys, so extension and connectivity checks should pass before live use.
Go to SophMate > Settings, choose the AI provider, paste the provider API key, and save the configuration. Use a provider key created specifically for this site or client account.
Use the Test Connection control and read the result. A successful test proves the WordPress server can reach the provider and that the key is accepted.
Configure the monthly site budget and daily per-user limits before inviting more users. Start conservative, then raise caps once real usage patterns are visible.
Keep a note in your launch checklist with provider, budget, and administrator owner. If support is needed later, include the diagnostics report rather than exposing secrets.
The setup is working when the provider test passes, diagnostics show expected connectivity, budgets are configured, and no support-ready evidence exposes the provider key.
Document provider ownership, budget owner, connection-test result, diagnostics status, and who may change settings later.
A site administrator should own this setup and revisit it after provider, budget, hosting, or team-access changes.
Escalate when diagnostics continue to fail after provider, budget, and hosting checks are verified.
Run this workflow on a low-risk example first. Once the result is easy to review and explain, decide whether it should become a repeatable playbook, workflow, watcher, agent, or documented team process.
Next step
Review the SophMate listing for current package details, screenshots, compatibility notes, and license terms.
Related
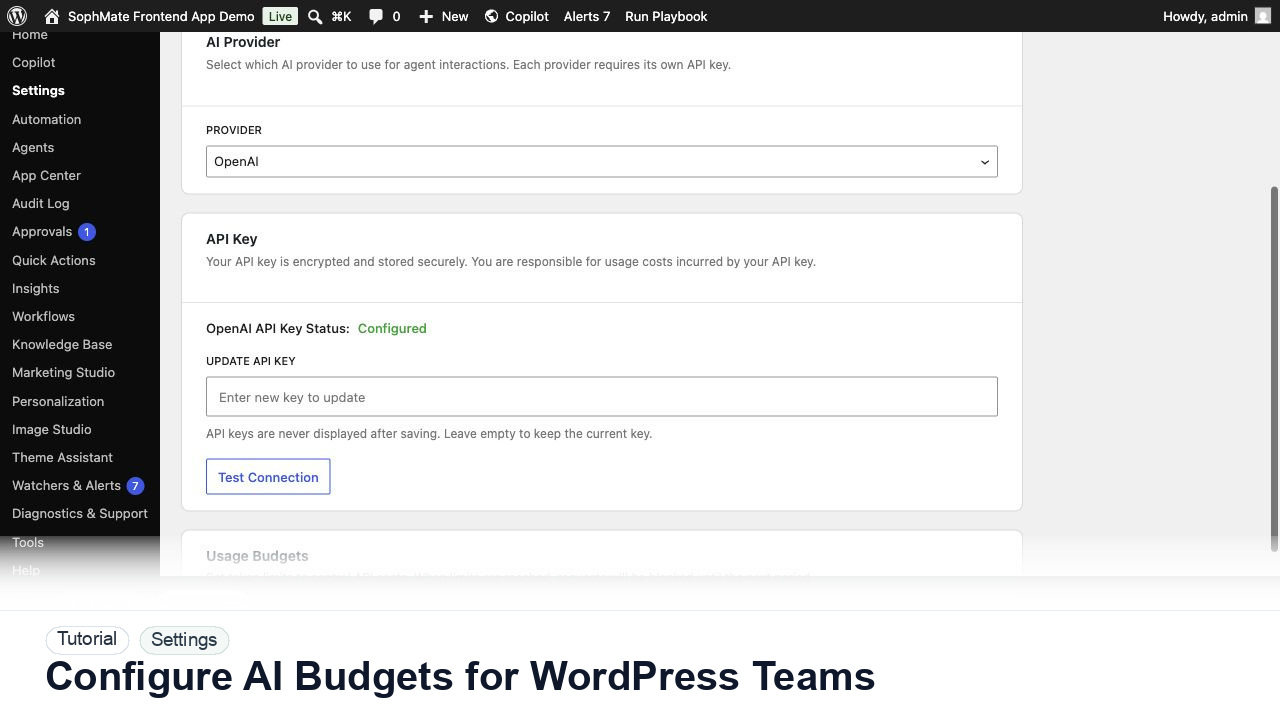
Set SophMate monthly and per-user budget limits so AI usage stays predictable across administrators, editors, support staff, and agencies.
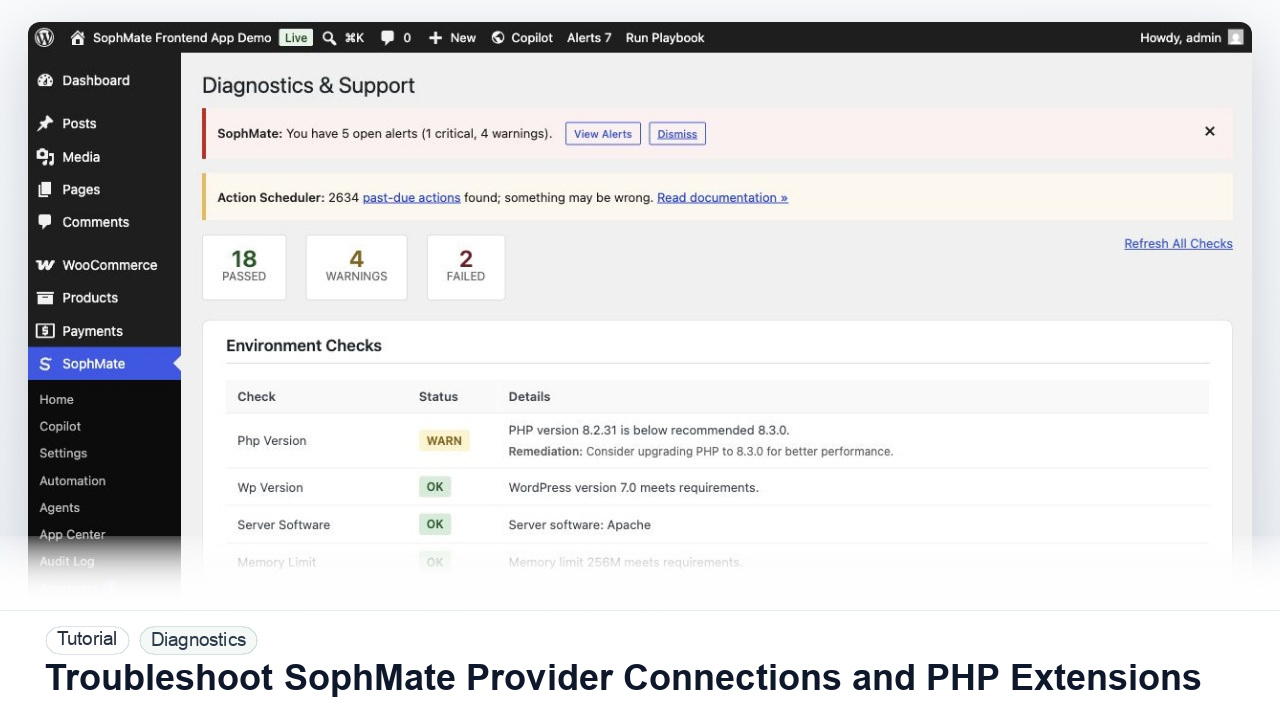
Diagnose failed provider tests, missing PHP extensions, outbound HTTPS problems, and environment warnings before users rely on SophMate workflows.