Marketing and personalization 6 min read Feb 27, 2026

Set Up Image Studio Providers, Brand Kit, and Onboarding

Configure Image Studio providers, test generation access, estimate costs, complete onboarding, and align brand kit settings before creative work.
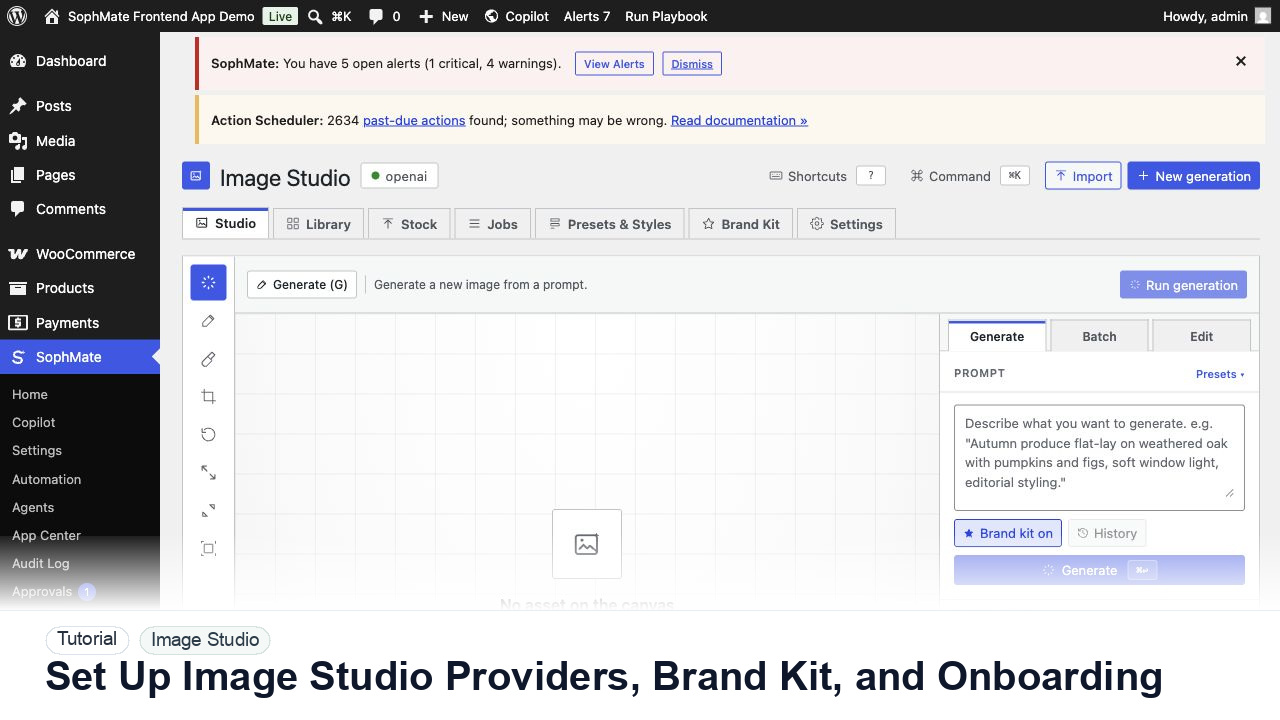
SophMate tutorial image for Set Up Image Studio Providers, Brand Kit, and Onboarding showing the related wp-admin workflow context.

Outcome

By the end of this tutorial, you will know how to use SophMate for SophMate Image Studio provider setup while keeping the work reviewable inside WordPress.

Scenario

A marketer wants to enable Image Studio for product visuals but needs provider readiness, budget expectations, and brand controls first.

Buyer evaluation note

Use this tutorial to evaluate whether SophMate keeps generated visuals production-ready. Buyers should see product accuracy, rights notes, brand fit, alt text, owner review, Media Library handoff, and placement decisions before assets go live.

When not to use this workflow

  • Do not use Image Studio output when rights, product accuracy, brand fit, alt text, or placement are uncertain.
  • Do not import rejected drafts into the Media Library for later sorting.
  • Do not use this workflow to bypass the normal owner, reviewer, or approval path for production changes.
  • Defer the workflow when the source data, permission boundary, rollback owner, or customer impact cannot be explained.

Example operator request

Generate image options for this approved campaign brief. Keep drafts separate until product accuracy, rights notes, brand fit, alt text, owner, and Media Library placement are reviewed.

What the image shows

The tutorial image shows Image Studio in wp-admin so the reader can see prompt controls, brand kit context, asset review, and the handoff point before anything enters the Media Library.

Before you begin

  • Prepare the approved campaign brief, product facts, brand constraints, rights notes, alt-text expectation, and intended placement before generating assets.
  • Keep drafts staged until a human accepts product accuracy, brand fit, usage rights, and Media Library destination.
  • Confirm SophMate is active, diagnostics do not show blocking failures, and the current user role can open the relevant SophMate module.
  • Check provider, budget, privacy, and approval settings before asking SophMate to draft or execute work.
  • Keep customer data, API keys, purchase codes, and private credentials out of prompts unless this workflow explicitly requires and permits that context.

Access and data boundary

  • Use brand-approved prompts, references, product facts, and placement notes; avoid protected likenesses, unlicensed source images, and inaccurate product claims.
  • Keep drafts separate from Media Library assets until rights, alt text, owner, and intended placement are accepted.
  • Use the least-privileged SophMate role that can complete the review, and keep administrator-only access limited to setup, provider, billing, diagnostics, and high-risk approval work.
  • Prefer record IDs, short excerpts, and redacted screenshots over full customer records, payment details, provider keys, purchase codes, or raw server logs.

Guardrail

Keep drafts separate from approved Media Library assets until image quality, rights, alt text, and placement are reviewed.

Common mistakes to avoid

  • Importing every draft into the Media Library instead of only approved assets.
  • Writing alt text as keyword stuffing instead of describing the actual image.
  • Ignoring product accuracy, campaign fit, or rights notes because the image looks polished.

Step 1: Complete onboarding deliberately

Use onboarding to confirm provider, permissions, image limits, brand owner, accepted use cases, and when generated assets require review.

Step 2: Test provider health

Run provider tests before campaign work and record model availability, failure behavior, moderation response, and expected retry path.

Step 3: Estimate generation cost

Estimate cost for single, batch, variation, edit, and upscale jobs so image workflows do not surprise the site budget owner.

Step 4: Configure the brand kit

Set logo, color, typography, tone, negative prompts, product accuracy rules, and prohibited styles before broad generation.

Step 5: Approve the first asset workflow

Generate one low-risk asset, review metadata, and save only the accepted version to the Media Library.

Review checklist

  • Provider tests pass before creative work.
  • Cost expectations are documented.
  • Brand kit rules are applied to first assets.

Production readiness

  • Review prompt, source provider, brand kit, rights note, product accuracy, alt text, and intended placement before Media Library import.
  • Keep rejected drafts out of production media collections.
  • Run the workflow first on a narrow, low-risk record or page before expanding scope.
  • Confirm the reviewer, approval rule, and evidence location before any production-changing action runs.

Failure modes to test

  • Test off-brand output, inaccurate product rendering, missing rights notes, weak alt text, rejected drafts, and Media Library import failure.
  • Confirm rejected assets stay out of production collections and do not become reusable campaign material.
  • Test the path where the user lacks permission, required context is missing, or the reviewer rejects the result.
  • Confirm the failed state leaves an audit record, visible owner, and clear next action instead of a silent or ambiguous outcome.

Success signal

The image workflow is successful when only approved assets enter the Media Library with useful metadata, clear alt text, and a known campaign or page placement.

Post-run monitoring

  • Review generated asset acceptance rate, rejected drafts, alt-text quality, rights notes, and Media Library imports.
  • Watch whether prompts or brand-kit settings need tightening before batch generation.
  • Review the audit log, diagnostics, and affected WordPress records shortly after the first run.
  • Record any confusing output, missing source context, permission issue, cost spike, or reviewer correction before repeating the workflow.

Safe expansion criteria

  • Approved assets include rights notes, alt text, intended placement, and brand-owner acceptance.
  • Rejected drafts have been reviewed for prompt or brand-kit improvements before batch work expands.
  • The first run has a documented owner, evidence, review result, and stop path.
  • A second operator can repeat the workflow from the notes without relying on hidden context.

Rollback or stop path

If an asset is inaccurate, risky, or off-brand, keep it out of the Media Library, archive the draft, and regenerate only after updating prompt or brand-kit constraints.

What to document

Document prompt, brand kit, source provider or stock source, rights notes, selected asset, alt text, and intended placement before Media Library import.

Owner and cadence

A marketer or editor owns the asset decision, while the brand owner should review recurring campaign visuals and Media Library handoff rules.

Escalate when

Escalate when image rights, product accuracy, brand compliance, or customer-facing claims are uncertain.

Common questions

Should every generated image be saved to the Media Library?

No. Keep drafts separate until product accuracy, rights notes, brand fit, alt text, owner, and intended placement are approved.

Does this workflow remove the need for human review?

No. SophMate should make the work easier to draft, inspect, approve, and repeat. Human review remains necessary when output affects customers, money, published content, privacy, settings, or workflow execution.

What should be documented before expanding the workflow?

Record the owner, input scope, access boundary, approval point, failure modes tested, evidence location, monitoring window, and rollback or stop path.

Next action

Select one approved draft, add rights and alt-text notes, then import it to the Media Library only when the placement owner accepts the asset.

Next step

Bring this workflow into your WordPress site

Review the SophMate listing for current package details, screenshots, compatibility notes, and license terms.

View on CodeCanyon

Related

More from Marketing and personalization

Pro